 Ritsuko Nakata, co-author of Let’s Go, looks at how to introduce new language so that children actually remember and use it.
When I first started teaching, I couldn’t understand why my students could not always speak and use the language they had been taught. Sometimes they couldn’t even remember what they had learned in the previous lesson. They were excellent at repeating after me (like parrots), but they could not say anything on their own without lots of hints. They learned vocabulary, but sentences and question forms were difficult for them. I used to blame the students for not remembering – but it wasn’t their fault. It was mine.
I taught the only way I knew how and used the only texts available then, all of which were ESL focused. These texts included a lot of idioms and expressions, which were too difficult for my students, and there was not enough systematic language build-up to help them progress step by step. Later, I began to experiment with other teaching methods. I found that if I was systematic in my approach, but also varied the presentation and practice of target language, my students learned far more quickly – and actually had fun. I also had fun!
This discovery led to my Model, Action, Talk (MAT) Method. This method focuses on introducing new language in a way that links it with actions so that students remember more and USE the language with confidence (not just repeat it).
It’s important to remember that our students usually don’t hear or speak English on a daily basis. Therefore, we must give them the opportunity to practice as much as possible during class time. In Japan, our lessons run once a week, and usually last 50 to 60 minutes. That adds up to about 35 to 40 hours a year, which is not even two days! No wonder it is difficult to get our children to remember everything. So I devised a way to run intensive lessons that get students to have fun drilling and speaking. I use ‘six-second’ drill games, which are short, fast and fun. They keep the students’ attention and, because students are repeating new language many times at a NATURAL speaking speed, with corresponding actions, they remember it well.
After my students learn the new language, I give them more speaking practice through group activities and pairwork. Notice that I, the teacher, don’t call on individual students. Instead, while students are practicing as a class, in groups and in pairs, I can watch them to pick up problems. I then do more six-second drills for words and phrases that the students have found difficult. Then we do reinforcement activities (or what I call Learning Activities). These are fun games with specific goals that help students become confident in speaking alone with their friends.
Introducing new language to students can be challenging. It was for me when I first started teaching! So when I submitted my first drafts for Let’s Go, I included the most important thing that children need to learn a language: a systematic approach that starts with vocabulary, moves on to a sentence using the words in context, and then introduces question forms. Through these three steps, students can, and do, start talking to each other in their very first lessons.
The ‘Three Steps’:
- Vocabulary
- Sentence pattern
- Question form
Most teachers feel that teaching new vocabulary is the easiest step, followed closely by the sentence pattern. What they find most challenging seems to be teaching the question form. Some teachers have told me that they teach the vocabulary only – but I feel very strongly that our students need to know how to make sentences and ask questions by themselves to become independent speakers of English. With my ‘Three Steps’ technique, I find that children have the most fun practicing the question forms. They are thrilled to be able to speak in English to their friends.
In addition to the ‘Three Steps’, I have tried many ways to get students to learn and remember. Breaking away from the traditional teacher-centered way of teaching and making the whole lesson game-like, with the students doing most of the talking, has produced amazing results. I’ve also found that this approach takes the different learning styles of children into account which means that all my students are cared for and helped to learn. Using speed, rhythm, actions and speech simultaneously helps to stimulate both sides of the brain for maximum results. My students get excited about learning English and they especially enjoy talking to their friends in English.
I’d love to share some of the tips and techniques I’ve learned over my 30 years of teaching. Please join me for my webinar on Saturday, 26 January, where I will demonstrate how all three steps can be done quickly and easily, and how teaching the question form can be effective and fun. I will also focus on how to get students to use the articles, a & an properly. Then we’ll look at getting children to talk to each other!
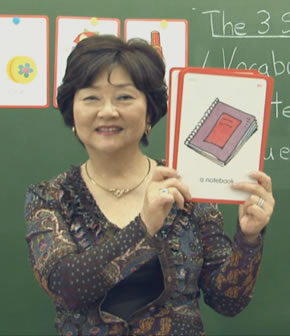
In the meantime, here’s video clip showing how I make a shapes lesson memorable and fun. I’ll share more with you on 26 January!
Did you miss the webinar? You can watch the recording here. Visit Let’s Share for more videos, blogs and upcoming events by our Let’s Go authors.
[…] Ritsuko Nakata, co-author of Let’s Go, looks at how to introduce new language so that children actually remember and use it. When I first started teaching, I couldn’t understand why my students cou… […]
[…] Ritsuko Nakata, co-author of Let’s Go, looks at how to introduce new language so that children actually remember and use it. […]
I love this post Ritsuko! I am a huge proponent of cultivating an active participation learning environment. My approach to teaching has always been kinetically oriented as my mantra for how I teach is “move”–I want the students to move their bodies and to move their mouths. By having them actively participate in the learning experience, as you so wonderfully demonstrate, I believe students are able to create an experience of language that transforms language into something that is organic and alive. Thanks for sharing!
Thanks, Chris!
I’m really happy to know your classes are active, not only in moving, but also in speaking.
I found that the combination of speaking and movement was the fastest and best way to involve the students and to have them remember long after the lesson was over. I’m sure your students are having a great time in your classes! Thank you for letting me know what you think.
I think the idea of actions on at class time is very good and effective. Students mustn’t repeat or say something apart their own world as a context of use. They should be guided to use and move away from given utterances to explore language and meaning acting and thinking them out as a real expression. Reality does not mean a copy of reality but a real and constructive experience through a meaningful, active process of language.
Hi Luisa,
Thank you for your very good comments! I think it’s important for our students to learn the basics of how to construct language and try to expand so that they will be able to talk about things on their own.
Yes, we want our students to experience how they can use the language and how much fun and enlightening it can be to be able to communicate meaningfully.
[…] Introducing new language so that it sticks (oupeltglobalblog.com) […]
Hello Ritsuko!
I’ve seen your video and I’ve really liked the method. It’s very active and participative but I’ve got a question… How do you teach the negative form? Do you use another action to teach it? Or you just say how the sentence is made in negative, explicitly saying the word “negative”, in their native language? Thanks in advance
Hi Anabel,
I’m glad you like the video and I hope you’ve tried some of the techniques in your classes.
As for your question regarding how to teach the negative form, we teach it after the students know how to say the statement with whatever gestures are used for that statement.
Then we teach the negative form. We separate the statement from the negative so that the students won’t get confused.
We have a gesture for expressing the negative. Cross both arms in front of your chest like an “x”.
I don’t like snakes/I can’t swim/ I’m not going to the library, etc.
At the same time we show them the picture cards, however, make sure the cards are upside-down. This is an important step because it’s a visual cue for the kids to make the negative statement. They love it and laugh in the beginning, but after they get used to saying the negative form, the teacher then mixes the cards. Some are right-side-up, others are upside-down, and the students have to say the sentence according to what the card shows. It’s a big and fun challenge for the kids, and the teacher doesn’t have to do any extra talking. Just showing the cards gives the cues to the students.
This is also used for practicing the Yes/No answers: Yes, I do/No, I don’t, etc.
The cards show them what to say.
I hope this helps. Please try it, and you’ll find how easy it is to elicit both affirmative and negative statements.
Good luck with your lessons!
Ritsuko Nakata
Thanks a lot for your explanation. It has really helped me. I’ve only tried the affirmative form and I’m very surprised how it has stuck in my students’ minds. As for the gesture you use for the negative form (crossing both arms in front of the chest) is it the same that you use in your video for” I like”? Then, maybe it has to be changed for crossing them in front of the forehead, for example. Or do you use the same gesture for teaching all statements regarding LIKE?
If I’ve understood it properly, you use different gestures for different structures (crossing both arms in front of the chest for LIKE) but what other gestures do you use for teaching structures such as CAN, HAVE GOT, 3rd person singular…?
I’m sorry for making so much questions but your method has really liked me and it has worked quite well! If you’ve got any website or blog where you explain all about your method I would be pleased to have the link.
Thanks in advance Ritsuko.
Anabel F,
Hi again, Anabel,
There is a slight difference between No and Like.
With “like” the arms are crossed and the hands are on one’s chest, but with “no”, the arms are crossed at the wrists so that the hands are up. Also, they do not touch the body.
We have other gestures and we like to keep them uniform so that when students move, they can find a MAT teacher using Let’s Go and participate easily. It’s a bit difficult to describe them. I am planning to write an English version on the MAT Method soon. In the meantime, I think you can make up your own gestures to help your students remember better.
Have you seen my videos on the Let’s Share page? My home page is http://www.iieec.com. I am also on Facebook. Anabel, can you tell me where you live and what kind of school you are teaching at?
I hope I’ve helped a bit. Have fun teaching!
Ritsuko Nakata
Hi again, Ritsuko.
Thanks for all. I’ve seen some of your videos and now I understand the difference between No and Like. I’m an English teacher in a Primary School in Madrid (Spain). I’m very interested in your method. I think that gestures help a lot specially when they receive so little time of English during the week. We have 2 hours a week for students aged 6-7 and 3h from 8 up to 12 years. It’s a pity I missed your webinars. I don’t know if your’re planning to give more, I’ll pay attention. It has helped me the fact that you took pictures about the actions.
I don’t know if you’re planning to give a seminar or a workshop in my country. Anyway, I encourage you to give an European tour about it and visit us.
Thanks for your help.
A. F.