 Shaun Wilden, a freelance teacher trainer and expert in online tutoring, shares his advice for teachers new to using digital coursebooks in the classroom and offers practical guidance for getting the most from the Oxford Learners’ Bookshelf.
Part 1 – Preparing for your first lesson
If you’re starting to teach with digital, tablet based coursebooks for the first time, you may be wondering how best to get your students off to a good start. With this is mind here is the first in a series of blog posts to help you get started. Following the few key steps outlined below before you start, will have you facing your first digital coursebook lesson with confidence and a clear sense of what you are going to do and achieve.
Preparing the tablets
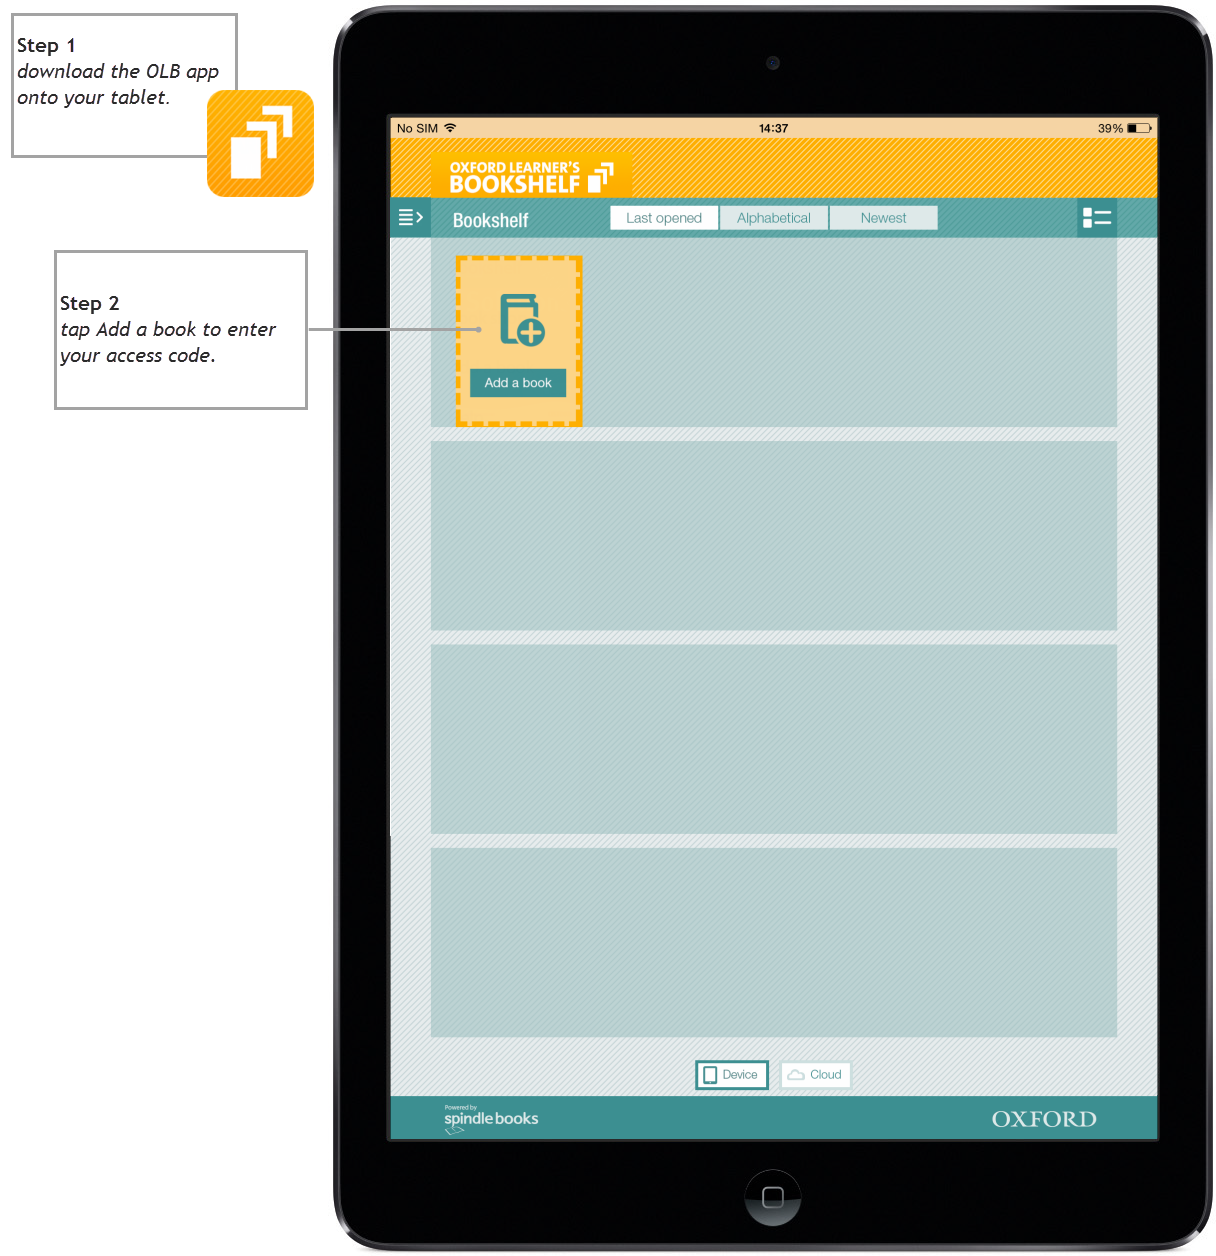
If your school is providing the tablets, make sure that the IT person who looks after the tablets has downloaded the free Oxford Learner’s Bookshelf app (OLB). If students are bringing their own, they’ll need to download the app themselves. For iPad go to the App Store, for Android tablets go to Google Play.
Students need to register with Oxford, or log in with an existing account. Having an account means that your students’ e-books are safely saved in the cloud, and students can access them via the newly launched web player at www.oxfordlearnersbookshelf.com, as well as on their tablet. This video will show you what’s changed and how to register and access your books.
If you haven’t worked with a digital book before, open the OLB app and log in and you’ll see the Bookshelf with the books that have been added. If you don’t see your book it might not yet be downloaded from the cloud. Look at the bottom of the screen and you can alternate your view between device and cloud. If the book is in the cloud, you can tap Download to transfer it to the device.
Ideally, the e-books will have been downloaded onto the tablets before the first lesson. They are quite large files, particularly the ones with audio and video, and can take a while to download. Your students can start looking at the books as soon as they start downloading, but it may take a while before any audio or video is available.
If the tablets are ready before the class, do check your own and some of the students’ tablets are working well before your first class. This gives you a chance to go back to the IT person to sort out any hiccoughs.
Getting to know your new coursebook
Tap on the cover of the book you want and it will open. If you compare it to the paper-based version of the book then you’ll notice the content is the same. Now you can breathe a sigh of relief as you realise all those wonderful lesson plans and activities you used last year are still relevant.
I can hear you muttering, how are they still relevant, we’ve gone digital. Well, the second point to remember is that you are not going to use the tablet all the time. Most of use wouldn’t use a paper coursebook for the whole lesson so why would we change that? As I am sure you have heard before, the coursebook is one of the many tools at the disposal of the teacher, digital or not. To maximize language learning we want to encourage interaction as this leads to communication so sometimes, perhaps more often that you currently think, you’ll be asking the students to switch off the tablet. Therefore those lovely laminated cards you have to prompt discussions are still going to make an appearance at some point.
So what are the differences? Rather than turn the page, a swipe changes it. Pinching can enlarge a picture or a text, something you can’t do with paper. Remember that when you want the students to look in more detail at a photo or when the student who has visual impairments needs a bigger script.
As a I talked about in a previous blog post, for most books listening is inbuilt and some even have video. Play around, click on some of the icons on the page and see what happens. As I say to my students, you can’t break anything. By the end of your playing make sure you also know how to input text into exercises. Now think about how you are going to show your students how to do these things, will you simply let them click and discover? If you have a projector in your class, do you know how to connect your tablet so that students can see your screen? If you have Apple TV or Google Chromecast, do you know how to reflect your screen so all can see?
There is of course one other feature that you need to get to grips with, the interactive tool bar.

You should see it on the screen a grey bar to the left of a page. To open it, tap the white arrow and it will appear. Personally I use this as part of the orientation process in the first lesson. So let’s move on and think of that.
Student orientation
Tablets ready, book downloaded, time for the first class. We’ll assume that the school’s administration has already gone over how they are to be used with the parents and students. So you’re entering the room tablets at the ready. I tend to prefer students sitting in groups when using tablets so I arrange desks into islands rather than in rows.
If you do this make sure everyone has sightline to the board. The first thing I would do is leave the tablets to one side. It is after all the first lesson of the year, time for students to tell you what they did in their holidays and get out their mobile phones to regal everyone with photos of whichever exotic location they spent their vacations in. Remember that students are used to doing things on their phone as most probably are you. There is already a digital know-how to tap into. But bear in mind that it would be wrong to assume that students have touched a tablet before and therefore know how to use it. So before we get going on the digital books we need to discover what they know. In true traditional classroom style, what better way to do this than a ‘find someone who’ exercise. You know the one I mean, students have a set of statements that they walk around the class turning into questions and searching for someone who answers yes.
Here are some (for an iPad) that I show on a screen and get students to do:
Find someone who:
- Can switch the tablet on
- Take a screenshot
- Search the iPad
- Mirror the iPad through apple TV
- Turn up the volume
- Turn up or down the brightness
- Lock the screen’s orientation
- Take a photo
- Open an app
- Close an app
Give students time to circulate and try and find people. Do feedback with the class, now is a good time to hand out the tablets so students can teach each other. This is where sitting in islands aids peer teaching. You can ‘check’ students are getting comfortable with the tablet by walking round to each island, offering advice and helping as necessary.
After this task, I get the students to put the tablets down, give them some paper (yes paper!) and ask them to come up with a list of rules / limits for classroom use of tablets. These include factors such as staying on task, not downloading apps (though hopefully your IT person has locked down the wi-fi or added a content filter). This is like making a class contract but not simply covering rules about punctuality and homework.
It is now time to launch the digital coursebook and start getting the students used to the tools. If you need the students to make their own accounts to download the books then walk them through it using your tablet on a projector. If the books are already there, then get them to log in and start getting them used to the tools. It’s perhaps best not to go over them all in one lesson so as not to overload. On my tablet I project a word cloud of some of the tools like this:
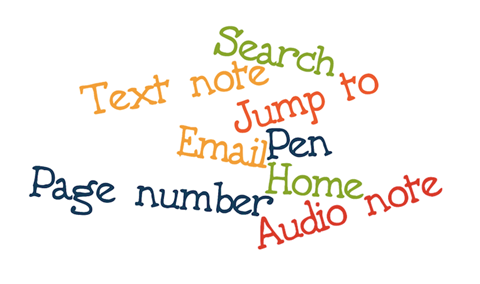
(made with the Word Art app)
Get the students to switch on their tablets and tell them how to find their coursebook in OLB. They then work together to identify the features named in the wordcloud. When you’re ready to check the answers, switch your tablet to display the book and ask students to name the tools. If you are projecting onto a whiteboard you can of course write the name of the feature next to the tool.
So that’s it, I hope that’s helped you overcome any first lesson dread. When you think it about it, starting with a digital coursebook is not that different from any lesson using a new coursebook. At first preparation time might increase but it will improve as you get more familiar with your material, the same as it would with when using the new coursebook. Often in a first lesson, a teacher does an orientation quiz and here it’s not different though we’re orientating to tools not the book itself. What’s more as I mentioned earlier, a lesson using a digital coursebook doesn’t have to be dominated by the book. Here we spoke, collaborated, mind mapped and perhaps most importantly we got the students communicating in English.
Right, now that’s the first lesson under your belt, time to get ready for the next one, which we’ll look at in the second post.
Reblogged this on Halina's Thoughts and commented:
Getting to know your new coursebook
Tap on the cover of the book you want and it will open. If you compare it to the paper-based version of the book then you’ll notice the content is the same. Now you can breathe a sigh of relief as you realise all those wonderful lesson plans and activities you used last year are still relevant.
This all sounds wonderful so I went and downloaded the app immediately. My question is, where or how do I get my access code?
Hi Gabriela, the best place is to go to http://www.oup.com/elt/fingertips. You can choose to buy in-app or your institution can buy access codes for students. Hope that helps.
Thanks, it helped a lot. I’ve already bought a couple of books and I’m using them for my lessons!
Outstanding post but I was wondering if you
could write a litte more on this subject? I’d be very grateful if you could elaborate a little bit further.
Appreciate it!
Hello, I was considering buying an access code for Navigate books. Unfortunately, it is impossible to buy it in the country I live in. Is it possible to buy it online in your website? Could you please tell me if each book has a certain expire date or once we buy the books we can use it for good?
Hi Madina, thanks for your message! Please could you email [email protected] with your query? Our dedicated support team will be able to tell you how you can access to these materials and information on expiry dates. Hope this helps! ^Katie
[…] 6. Teaching English with e-books from Oxford Learner's Bookshelf […]
[…] 6. Teaching English with e-books from Oxford Learner’s Bookshelf […]
[…] 9. Teaching English with e-books from Oxford Learner’s Bookshelf […]
[…] Insegnare l’inglese con gli e-book nello scaffale di Oxford Learner (Parte 1) […]
[…] 9. Teaching English with e-books from Oxford Learner’s Bookshelf […]
[…] 6. Teaching English with e-books from Oxford Learner’s Bookshelf […]
[…] 7. Teaching English with e-books from Oxford Learner’s Bookshelf […]
Hello, where does the app keep the files on my device? I am having trouble with the storage space on my device. So, I want to clean up some space where the app keeps its data. Many Thanks.
Hi there, thanks for getting in touch. Please visit our help and support page -> https://oxelt.gl/3i1GI9z Here you can chat live with our dedicated support team! If you want to clean up/remove some titles, the support team will be able to talk you through the process and possibilities. Hope this helps, ^Chesca
[…] 9. Teaching English with e-books from Oxford Learner’s Bookshelf […]